How to Flash a Fon Mini Router (Fonera) with FonFlash
FonFlash is a cross‑platform utility (Windows, macOS, Linux) that can flash multiple firmware types — including Gargoyle/OpenWrt, official Fon NG, and DD‑WRT — on LaFonera and Atheros‑chipset devices .
What You Need
FonFlash for your OS (Windows, macOS, or Linux)
WinPcap (Windows only) to enable network capture
Firmware files for your model (e.g., .squashfs rootfs + .lzma kernel for OpenWrt/Gargoyle, or single file for DD‑WRT)
Ethernet cable to connect router to PC
Router reset to factory defaults (see DD‑WRT Wiki for Fon2200 reset steps )
FonFlash for your OS (Windows, macOS, or Linux)
WinPcap (Windows only) to enable network capture
Firmware files for your model (e.g., .squashfs rootfs + .lzma kernel for OpenWrt/Gargoyle, or single file for DD‑WRT)
Ethernet cable to connect router to PC
Router reset to factory defaults (see DD‑WRT Wiki for Fon2200 reset steps )
Step‑by‑Step (Windows Example)
Install prerequisites
Download and install WinPcap (and MSVC++ for Vista if needed) .
Download FonFlash for Windows from the Gargoyle Wiki or Village Telco’s site .
Prepare firmware
For OpenWrt/Gargoyle: you need two files — .squashfs (rootfs) and .lzma (kernel) .
For DD‑WRT: usually a single firmware file .
Connect router
Set PC IP to 169.254.255.2 with subnet 255.255.255.0 .
Connect router to PC via Ethernet.
Run FonFlash
Launch FonFlash, select the correct firmware files, choose the Ethernet interface, and click Flash router now .
The tool intercepts the boot process and writes the firmware.
Reboot
Immediately power on the router after flashing.
The process should take under 2 minutes .
Install prerequisites
Download and install WinPcap (and MSVC++ for Vista if needed) .
Download FonFlash for Windows from the Gargoyle Wiki or Village Telco’s site .
Prepare firmware
For OpenWrt/Gargoyle: you need two files —
.squashfs(rootfs) and.lzma(kernel) .For DD‑WRT: usually a single firmware file .
Connect router
Set PC IP to
169.254.255.2with subnet255.255.255.0.Connect router to PC via Ethernet.
Run FonFlash
Launch FonFlash, select the correct firmware files, choose the Ethernet interface, and click Flash router now .
The tool intercepts the boot process and writes the firmware.
Reboot
Immediately power on the router after flashing.
The process should take under 2 minutes .
Tips & Warnings
Backup settings before flashing; you’ll lose custom configurations .
Use the exact firmware for your model to avoid bricking.
If flashing DD‑WRT, ensure you follow the correct reset procedure to remove old firmware .
FonFlash is open‑source and can be compiled for other platforms .
Backup settings before flashing; you’ll lose custom configurations .
Use the exact firmware for your model to avoid bricking.
If flashing DD‑WRT, ensure you follow the correct reset procedure to remove old firmware .
FonFlash is open‑source and can be compiled for other platforms .
Where to Get FonFlash
Gargoyle Router Wiki: Fon Flash page
Village Telco: FonFlash guide
Gargoyle Router Wiki: Fon Flash page
Village Telco: FonFlash guide
In short: Download FonFlash, prepare the correct firmware for your Fon Mini router, connect via Ethernet, and use FonFlash’s GUI to flash. This method works for multiple firmware types and is safer than older AP51 tools .
https://wiki.dd-wrt.com/wiki/LaFonera_Software_Easy_Flashing. link dead
https://wiki.dd-wrt.com/wiki/LaFonera_Software_Flashing. most dead links, but 2 working
https://www.gargoyle-router.com/phpbb/viewtopic.php?t=70. forum alive
https://forums.hak5.org/topic/20395-guide-flash-the-fon-router-w-ddwrt/. dead links
https://openwrt.org/toh/fon/fonera. openwrt tutorial. important files available
https://archive.openwrt.org/backfire/10.03/ar71xx/packages/
FonFlash
The excellent Gargoyle router project maintains the FonFlash utility which can be used to flash your Mesh Potato. Directions for installing and flashing with FonFlash on Windows follow. An OSX version is also available.
Here are the steps for flashing first-generation (MP01) Mesh Potatoes from a Windows platform.
- Download and install WinPcap.
- Download the latest stable Mesh Potato firmware. You will need two files, one that ends in .squashfs and and one that ends in lzma.
- Download FonFlash for Windows. Once unzipped, it should just run as an executable file. FonFlash will prompt you for the correct firmware files. The file ending in squashfs is the Rootfs file and the file ending in lzma is the Kernel file. The firmware type is OpenWRT/Gargoyle. You will need to select the appropriate Ethernet interface that you have connected to the Mesh Potato.
- Once you have FonFlash loaded with the correct fields entered in the gui and have the Mesh Potato connected via ethernet, click “Flash router now!” and immediately power up your Mesh Potato. The FonFlash utility intercepts the boot-up process of the Mesh Potato and rewrites the firmware. The whole process should take less than two minutes. It can seem a little complicated the first time you do it but it rapidly becomes rote.
How to Backup Flash on RedBoot
You can back up your flash content in RedBoot by using the dump command (or dump -b <start> to specify a range) to read the raw flash data, then saving it to a file on your host system.
Step-by-step method
Connect and start RedBoot
Ensure your target is connected via serial (or Ethernet) and RedBoot is running.
At the prompt:Example:
This dumps the first 1 MB of flash to the local console.
Redirect output to a file
To save the dump to a file on your host, you can:Use the serial/USB terminal software to save the output file locally.
Or, if your RedBoot supports TFTP or NFS, use the
tftpornfscommands to copy the dump to a remote location .
Use
fiscommands for structured image backup
If you want to back up a specific flash image (e.g., RedBoot itself or an application), use the Flash Image System (FIS) commands :This reads the image from flash into your console or file.
To preserve the image for later use, you can also use:This writes the image back to flash, but you can first copy it out with
fis dump.Verify and store the backup
After dumping, save the binary file to a safe location. For recovery, you can re‑load it with:or with
tftp/nfsif available.
Tips
Address ranges: The
dumpcommand requires the start address and length. The FIS commands may have default ranges; check withfis list.Write‑protect: If your platform supports flash locking, you can lock the region before dumping to prevent accidental erasures .
Tooling: For large dumps, a terminal program with “save as file” feature is easier than manual console copy.
By using dump for raw flash and fis for image-level backups, you can safely create a complete backup of your RedBoot flash and recover it later if needed .
- REDBOOT manual
235.3. Flash Image System (FIS)
- fis init — Initialize Flash Image System (FIS)
- fis list — List Flash Image System directory
- fis free — Free flash image
- fis create — Create flash image
- fis load — Load flash image
- fis delete — Delete flash image
- fis lock — Lock flash area
- fis unlock — Unlock flash area
- fis erase — Erase flash area
- fis read — Read flash area
- fis write — Write flash area
Hardware APIs - Raspberry Pi Documentation

The Complete Raspi Pico Pinout Guide: RP2040 Maps, Gotchas, and Wiring Standards | ElectricalFlux
Configuring a Hardware Pin Layer in the Raspberry Pi Pico SDK
In the Raspberry Pi Pico SDK, the “hardware pin layer” refers to the GPIO hardware abstraction provided by hardware_gpio and related APIs. This layer lets you configure pins without directly manipulating hardware registers .
1. Understand the GPIO Hardware Abstraction
The SDK organizes GPIOs into banks (e.g., Bank 0 for user GPIOs) and provides:
Electrical control (pull-ups/down, drive strength, slew rate) via
pads_bank0_hwFunction multiplexing (muxing) via
io_bank0_hwSingle-cycle I/O via
sio_hw
You configure pins through the hardware_gpio API in src/rp2_common/hardware_gpio/include/hardware/gpio.h.
2. Basic Pin Configuration Steps
Here’s a minimal example to set up a GPIO pin:
This uses the hardware_gpio layer to control the pin .
3. Advanced Pin Layer Configuration
For more control, you can directly access hardware registers:
Here:
pads_bank0_hwcontrols electrical characteristics .io_bank0_hwcontrols function select/muxing .
4. Using PIO for Custom Pin Behavior
If you need programmable I/O (e.g., custom protocols), use the Programmable I/O (PIO) layer:
PIO can map pins to its input/output shift registers .
5. Key Tips
Always initialize the GPIO before use: gpio_init(pin).
Use gpio_set_function(pin, func) to select the correct function (GPIO, SPI, UART, etc.).
For board-specific pins, check PICO_DEFAULT_LED_PIN or the board’s pinout in the SDK’s boards/include .
The hardware abstraction hides register addresses, but you can bypass it for low-level control if needed .
Always initialize the GPIO before use: gpio_init(pin).
Use gpio_set_function(pin, func) to select the correct function (GPIO, SPI, UART, etc.).
For board-specific pins, check PICO_DEFAULT_LED_PIN or the board’s pinout in the SDK’s boards/include .
The hardware abstraction hides register addresses, but you can bypass it for low-level control if needed .
In short:
To configure a hardware pin layer in the Pico SDK, use hardware_gpio for standard GPIO control, pads_bank0_hw and io_bank0_hw for low-level electrical and mux settings, and hardware_pio for custom I/O behavior. This layered approach ensures you can configure pins without directly editing hardware registers while still having access to the raw hardware when needed .
OpenHantek and Rp2040
Yes, OpenHantek can accept a Raspberry Pi Pico (RP2040) as a USB front-end hardware device, but it requires specific firmware and a custom fork or patch of the desktop software.
Because the official, mainstream OpenHantek6022 application is built primarily for Hantek 6022BE/BL hardware, the open-source community created a bridge protocol to make the RP2040 mimic the device communication layer.
How it Works & Requirements
To make a Raspberry Pi Pico act as the front end for OpenHantek, you must utilize open-source custom projects such as the oscilloscope_rp2040 GitHub project:
1. Pico Firmware: You must flash your RP2040 with a dedicated .uf2 firmware file that configures its dual-core ARM processor to capture analog inputs and streams data via USB using the Hantek protocol.
2. OpenHantek Modification: Standard OpenHantek software may not recognize the Pico directly out of the box. You need to use a modified version/fork of OpenHantek6022 that includes RP2040 device support.
3. Signal Calibration: The RP2040 operates natively on a 0–3.3V Analog-to-Digital Converter (ADC) range. OpenHantek expects a standard ±5V range. To fix this, you must either copy a provided RP2040_0_calibration.ini file into your OpenHantek configuration directory or build an external analog conditioning circuit.
Performance & Technical Limitations
While it functions as a great budget or DIY project, the RP2040 front-end has physical performance bottlenecks compared to dedicated hardware:
• USB Speed Limits: The RP2040 relies on USB 1.1 Full Speed (12 Mbps). When pushing dual-channel capture to rates around 1 MS/s or higher, the USB bus hits its bandwidth ceiling, which can cause occasional dropped data samples.
• Bit Depth Scaling: The Pico features a 12-bit ADC, but the firmware scales the data down to 8-bit values to fit the OpenHantek protocol.
• Overclocking: To capture up to 2 MS/s, the firmware typically overclocks the RP2040 chip to 240MHz, which can slightly decrease the absolute accuracy of the ADC readings.
•
GitHub
Pull requests · OpenHantek/OpenHantek6022 - GitHub
Comfortable display density Compact display density Instrument-style UI, Autoset, optional SCPI/MCP remote control, zh_TW locale #
•
GitHub
Oscilloscope for the RP2040 - OpenHantek protocol · GitHub
Usage * Upload the oscilloscope.uf2 firmware to the RP2040. * Install OpenHantek. OpenHantek6022 needs RP2040 support: OpenHantek6...
•
WizzDev
A Practical Guide to 5V and 3.3V Logic Interfacing - WizzDev
Most modern microcontrollers, such as the STM32 family, ESP32 series and RP2040 operate natively at a 3.3V logic level. However, w...
https://github.com/OpenHantek/openhantek
https://github.com/dgatf/OpenHantek6022/releases. prebuilt available
https://github.com/dgatf/oscilloscope_rp2040#binaries
SSR

ssr using a moc3041 and bt138 - Other Hardware / General Electronics - Arduino Forum

(2) #EP-141 DIY 40Amp SSR (Solid State Relay). BTA41 MOC3021 - YouTube

25A Solid State Relay BTA24-600: Complete SSR Circuit Guide
Hot plate


https://www.hackster.io/john-bradnam/smd-reflow-hot-plate-new-version-edc02e
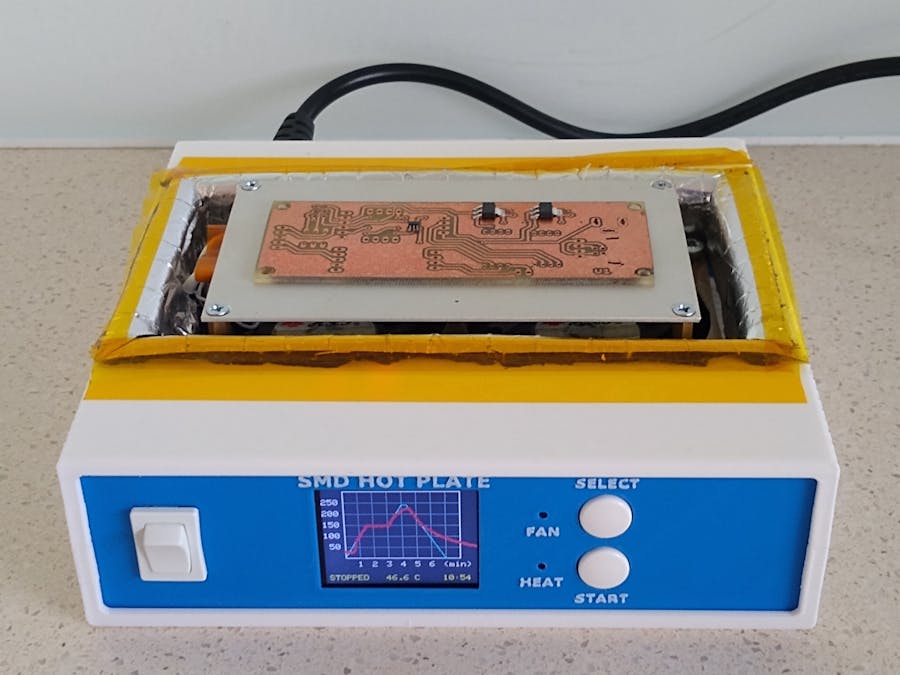
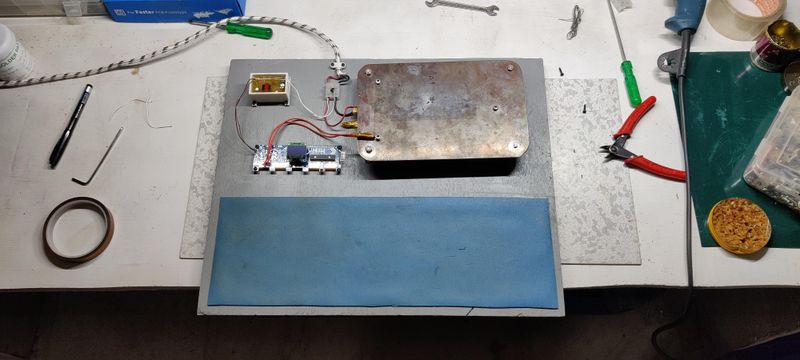


mini scroll saw
I never imagined building a scroll saw with a piston system
How to Make Simple Scroll Saw Machine
Masking tape label printer
Masking Tape Plotter | Hackaday.io
DIY Paper Tape Label printing CNC machine | Arduino + GRBL + BT + Android
Teaching Arduino to type telegrams / Habr
writing machines
https://www.youtube.com/watch?v=JxLAqmhMSys
https://www.instructables.com/4xiDraw/
https://github.com/KnoxMakers/KM-Laser
paint brush
https://www.youtube.com/watch?v=oF84Hm22HuQ
https://www.youtube.com/watch?v=J6OHmsmRD9E
https://www.youtube.com/watch?v=VJNljELjUUg
Induction heater
DIY 14kW Induction Heater | Molten Steel & Calcium Carbide
https://teslascience.wordpress.com/autotuning-9kw-induction-forge-version-1-2/
https://github.com/metanurb21/esp32_igbt_driver?tab=readme-ov-file
DC fan
https://www.edn.com/4-wire-pc-fan/
http://pavouk.org/hw/fan/en_fan4wire.html
https://www.hackatronic.com/brushless-dc-bldc-motor-driver-circuit-using-555-timer-ic/#google_vignette
Ten Tries - YouTube
mostly casting, pouring aluminum, making tools
Casting Furnace waste oil burner clog free operation
🔥 Homemade crucibles for CASTING and MELTING metals with your own hands
https://github.com/metanurb21/esp32_igbt_driver?tab=readme-ov-file
DIY-4kW-Induction-Heater
5 Minute DC To BLDC Motor Upgrade For MAXIMUM Best Performance | MrAviPro
How To Make 3-phase Bldc Motor Controller At Home Very Easy || Circuit Diagram Pdf Free Download
How To Make A High-Speed 40a BLDC Motor Speed Controller Without Sensor Free | MrAviPro
Brushless DC motor controller using Arduino and IR2101
CPU FAN HIGH SPEED Bldc Motor Controller MAKE At HOME | MrAviPro
Engineering_Projects/ProjectFiles/High-Speed Pen Plotter at main · IVProjects/Engineering_Projects · GitHub
Project - Fuel Injection with Teensy | Carlos Takeshita
Thermal camera diy
DIY-Thermocam | Open-source thermal imaging for everyone!
Zero Play Guide Bars - Metric and Countersunk by Rubes | Download free STL model | Printables.com
slide rails 3d files for download
[DIY]10 Jigs and Hacks to Improve Your Table Saw || somewhat I need
https://www.youtube.com/watch?v=KwuokHAi1JQ
[DIY] 5 jigs to improve your trimmer table || Woodworking
https://www.youtube.com/watch?v=qkY2s2nWV-g
3 wood jig game changer - dowel jig
3 Game-Changing Jigs for Woodworking
free plan crafping diy
https://www.youtube.com/watch?v=dqusGiSDfO0
drill bit sharpening
https://www.youtube.com/watch?v=ZTKRiQ3idZo
Yasuhiro TV
40 Simple Circular Saw Hacks | Japanese Woodworking
TOP 60 Router Trimmer Hacks | Japanese Woodworking
https://www.youtube.com/watch?v=RDkOLzF3PPw
10mins dowel jig
10 minutes Dowel Jig: Dowel joints got easier and quicker even by beginners (subtitle explanation)
woodworking hacks
https://www.youtube.com/watch?v=Pu7Qu-jNuPg
https://www.youtube.com/watch?v=IAba8HRfz4M
extend the capability of mini lathe
https://www.youtube.com/@Yakun1988
very good lathe tool making
https://www.youtube.com/watch?v=bSmHOu8ohwE
angle grinder 5 jigs ideas
https://www.youtube.com/watch?v=Y3huFArZ4kE
homemade tools, some good ideas
https://www.youtube.com/watch?v=zmjgVD7VcwU
best homemade tools in the past 3months
https://www.youtube.com/watch?v=JSGSh2f_2sE
3 homemade tools - blender, vise, belt gr
https://www.youtube.com/watch?v=ffGn0wa4hF0
3 homemade tools - drill, spring, screw th
https://www.youtube.com/watch?v=UqXhRliUXxE
make a mini mobile crank.. winch + hydraulic jack
https://www.youtube.com/watch?v=UI4bC93Iapo
repurpose hydraulic jack to other uses
https://www.youtube.com/watch?v=GgQAmFi-eJY
https://www.youtube.com/watch?v=97WgSkTmAMs
Making precision parts without big mill
https://www.youtube.com/watch?v=l0d9gyGMwyw
Gear making idea
https://www.youtube.com/watch?v=MiufkSj2QL8
Gear copy making machine
https://www.youtube.com/watch?v=MhJz2E-qfL8
Turn old oil filter into a angle grinder polishing tool
https://www.youtube.com/watch?v=ir4BVcv11tc
3D printed concrete lathe pt 2 .. .. seems sturdy and precise.
github files available
https://github.com/kachurovskiy/modulathe
https://www.youtube.com/watch?v=lnFw8G95LGo
Spot welder -- made in Poland... microwave transformer
https://www.youtube.com/watch?v=4q4oMVtW4FI
shredder made in Poland,, some good diy shop tools
https://www.youtube.com/watch?v=hZPB9I9ko4M
make a mini torch
https://www.youtube.com/watch?v=HRYJI_JTdco
Speed dry up silicone in 5 minutes
https://www.youtube.com/watch?v=feue9lgJGsg
Plasma Cutter from scraps
How to Make Your Own Crucibles (for microwave metal melting)
https://www.youtube.com/watch?v=uPz5VidjACI
TEMS LIST
Insulating Fire Brick, 2300F... https://www.amazon.com/dp/B0848PBH82?... TNLOJI 6-Gallon Galvanized Steel... https://www.amazon.com/dp/B0FJ4JLP78?... Nelyrho 6kg Crucible Tongs Set... https://www.amazon.com/dp/B0DX751CHY?... Ceramic Fiber Insulation, 1"... https://www.amazon.com/dp/B089KTMQX3?... https://www.walmart.com/ip/5ft-Propan... https://www.walmart.com/ip/Propane-Fo...
heat insulation contruction material
https://www.youtube.com/watch?v=z4_GxPHwqkA
melting furnace
https://www.youtube.com/watch?v=P-JouCI3dn8. aluminum, co2 cylinder crucible
joint compound- used oil+PVA+alcohol+ cement
https://www.youtube.com/watch?v=HEQCOjRRElc
https://www.youtube.com/watch?v=iUqscl4EGxQ. acetone + plexglass= clue
seal the concrete cracks correctly
https://www.youtube.com/watch?v=Br5i8nkW5DQ. quickrete plus backer rod
https://www.youtube.com/watch?v=SLUci2NDn1E. gasoline+styrofoam+PVA+cement
CNC Plasma cutter
https://www.youtube.com/watch?v=yIaLJ_s8hWE. $150 shopping links available
Mechanical work helper tools
https://www.youtube.com/watch?v=42EE_Bv_BNo. linked chains is your friend
A lot of the ideas from here DIY SteelBuilds
https://www.youtube.com/@DIYSteelBuilds
CNC plasma cutter
https://www.youtube.com/watch?v=I5lIiCZCbhQ
Build an elevator from $1 motor
made a forklift on a 12V winch
Get water from nature, no fee
Infinite Water for $12 — The Forgotten Engineering Trick
Solar Energy harvesting
My DIY Solar Generator Is WAY More Powerful Than I Thought..
Modify tape measure for better usages
Few People Know About These Hidden Tricks and Features of a Tape Measure!
Turn mini mill into cnc machine
The Best Benchtop Mill... If You Can Build It! (DMC2 Mini)
Shariff DMC2 Mini Upgrades BLog
DMC2 Mini CNC $2500 110v version
Turning a Cheap Mini Mill into a Capable CNC Machine
CNC machine fixing electronic and mechanical skills
Bought a Broken CNC Lathe They Don’t Want Me to Fix
lead acid recovery practical way. grinder blender on video
https://www.youtube.com/watch?v=PL5X2qsE7Qc. professor Basil
https://www.youtube.com/watch?v=Cq-LSj1aV64. clean, rinse, renew fluid, charge
https://www.youtube.com/watch?v=wXVB45RWn2k. vinagar , salt , and electrolyss
HHO generators
Water into Hydrogen - Simple Hydrogen Generator from Carbon Pin from battery carbon pins
https://www.youtube.com/watch?v=HiLH2TNdcFo. hydrogen run electricity generator
https://www.youtube.com/watch?v=_nKihWAYrEM. 1500w hho generator , naOH from baking soda
BLOGs
https://diyfan.blogspot.com/p/downloads.html
FHEM links:
Fhem: LCD 2004 Display with ESPEasy (Part 2) | Robin's Blog – Technology and Multimedia
Fhem: LCD 2004 display with ESPEasy as status indicator | Robin's Blog – Technology and Multimedia
Hareware hacks
i/index.php/Category:LaFonera_Hardware_%28en%29
https://wiki.dd-wrt.com/wiki/index.php/LaFonera_Hardware_32MB_SDRAM_MOD
https://forum.dd-wrt.com/phpBB2/viewtopic.php?t=37578. build Redboot
Fon 2200 flashing tutorials
https://openwrt.org/toh/fon/fonera
https://robotskirts.com/2010/01/19/la-fonera-flashing/
://github.com/ap51-flash/ap51-flash/issues/10
https://github.com/ap51-flash/ap51-flash
https://www.gargoyle-router.com/wiki/doku.php?id=fon_flash
https://www.gargoyle-router.com/wiki/doku.php?id=install_guide
https://forum.dd-wrt.com/wiki/index.php/LaFonera_Software_Upgrade-Flashing
https://wiki.dd-wrt.com/wiki/index.php/La_Fonera_Debricking
https://forum.dd-wrt.com/wiki/index.php/LaFonera_Software_Flashing
https://forum.dd-wrt.com/phpBB2/viewtopic.php?t=15085
https://hackaday.com/tag/la-fonera/
https://www.gargoyle-router.com/phpbb/viewtopic.php?t=11657
https://forum.dd-wrt.com/wiki/index.php/LaFonera_Software_Flashing#google_vignette
https://myfonblog.blogspot.com/2008/08/hacking-la-fonera-part-1-dd-wrt.html
GPS Archives - John's Tech Blog (hagensieker.com)
GPS Archives - John's Tech Blog (hagensieker.com)
(2) Easy One - YouTube ESP32 internet radio
Power on reset circuits:
c64DTV power on reset circuit | Evan's Techie-Blog (wordpress.com)
The Least Interesting Circuit in the World - Jason Sachs (embeddedrelated.com)

Power-On Reset (jacobsa.github.io)


On power up, these pins are read by the processor to determine the boot order. S2 is used to change the level of one bit from HI to LO which changes the boot order.
Always Boot from SD Card
ref: https://stackoverflow.com/questions/33030802/fix-the-boot-order-emmc-on-a-beagle-bone-black
A latching switch would be nice. Onboard flash is built in obsolescence.
Instructions
Put some leaded solder on both sides of R68 (bottom of board, the silkscreen is misplaced, but just count down the line). Use hot air to remove R68, being careful not to use too much air flow which will knock the resistor off your bench, onto the floor. The resistor is a 100K, in case you lose it.
After removing the resistor, use an iron to put small dobs of leaded solder on pad R93 (top side of board). Use hot air to heat the board until the solder is fluid, then place the 100K R onto R93, heating as necessary while being careful not to blow the resistor away.
Where are the registers for the BBB?
AM335x_TechnicalReferenceManual.pdf
e.g. https://www.ti.com/lit/ug/spruh73q/spruh73q.pdf

沒有留言:
發佈留言